In Android, EditText is a standard entry widget. A user interface element for entering and modifying text. When you define an edit text widget, you must specify the R.styleable.TextView_inputType attribute. For example, for plain text input set inputType to "text", In case if EditText field is for password, then we need to specify the inputType as “textPassword”.
<EditText
     android:id="@+id/plain_text_input"
     android:layout_height="wrap_content"
     android:layout_width="match_parent"
     android:inputType="text"/>
See the Text Fields guide for examples of other R.styleable.TextView_inputType settings.
Text Fields in Android Studio are basically EditText and we drag and drop or we can create edittext.
First, we will check the drag and drop option here
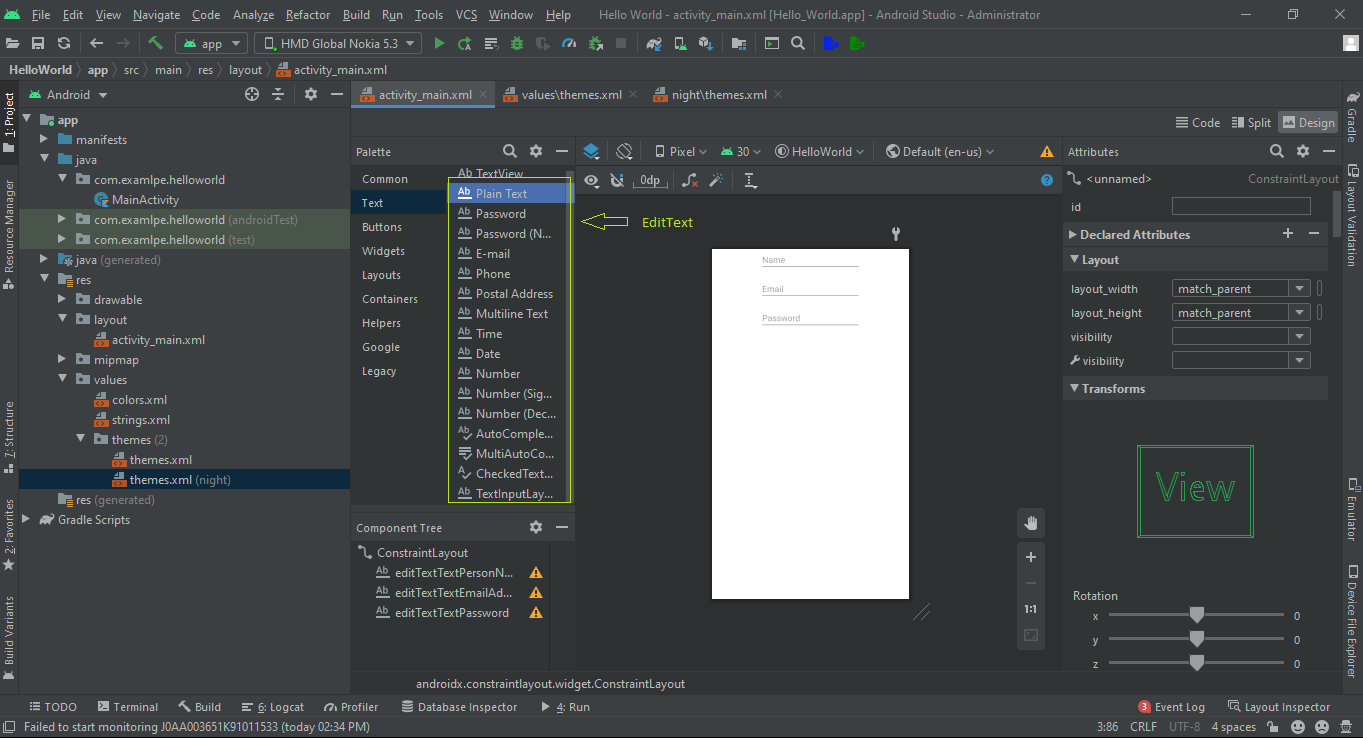
EditText instance by declaring it inside a layout XML file
<EditText
     android:id="@+id/plain_text_input"
     android:layout_height="wrap_content"
     android:layout_width="match_parent"
     android:inputType="text"/>
Attributes of EditText:
Now let’s we discuss few attributes that helps us to configure a EditText in your XML.
| Attribute | Description |
|---|---|
| android:id | It is used to uniquely identify the control |
| android:gravity | It is used to specify how to align the text like left, right, center, top, etc. |
| android:text | It is used to set the text. |
| android:hint | It is used to display the hint text when text is empty |
| android:textColor | It is used to change the color of the text. |
| android:textColorHint | It is used to change the text color of hint text. |
| android:textSize | It is used to specify the size of the text. |
| android:textStyle | It is used to change the style (bold, italic, bolditalic) of text. |
| android:background | It is used to set the background color for edit text control |
| android:ems | It is used to make the textview be exactly this many ems wide. |
| android:width | It makes the TextView be exactly this many pixels wide. |
| android:height | It makes the TextView be exactly this many pixels tall. |
| android:maxWidth | It is used to make the TextView be at most this many pixels wide. |
| android:minWidth | It is used to make the TextView be at least this many pixels wide. |
| android:textAllCaps | It is used to present the text in all CAPS |
| android:typeface | It is used to specify the Typeface (normal, sans, serif, monospace) for the text. |
| android:textColorHighlight | It is used to change the color of text selection highlight. |
| android:inputType | It is used to specify the type of text being placed in text fields. |
| android:fontFamily | It is used to specify the fontFamily for the text. |
| android:editable | If we set false, EditText won't allow us to enter or modify the text |
Now open an activity_main.xml file from \res\layout path and write the code like
<?xml version="1.0" encoding="utf-8"?>
<androidx.constraintlayout.widget.ConstraintLayout xmlns:android="http://schemas.android.com/apk/res/android"
    xmlns:app="http://schemas.android.com/apk/res-auto"
    xmlns:tools="http://schemas.android.com/tools"
    android:layout_width="match_parent"
    android:layout_height="match_parent"
    tools:context=".MainActivity">


    <EditText
        android:id="@+id/editTextTextPersonName"
        android:layout_width="wrap_content"
        android:layout_height="wrap_content"
        android:ems="10"
        android:hint="Name"
        android:inputType="textPersonName"
        app:layout_constraintEnd_toEndOf="parent"
        app:layout_constraintStart_toStartOf="parent"
        app:layout_constraintTop_toTopOf="parent" />

    <EditText
        android:id="@+id/editTextTextEmailAddress"
        android:layout_width="wrap_content"
        android:layout_height="wrap_content"
        android:layout_marginTop="16dp"
        android:ems="10"
        android:hint="Email"
        android:inputType="textEmailAddress"
        app:layout_constraintEnd_toEndOf="parent"
        app:layout_constraintStart_toStartOf="parent"
        app:layout_constraintTop_toBottomOf="@+id/editTextTextPersonName" />

    <EditText
        android:id="@+id/editTextTextPassword"
        android:layout_width="wrap_content"
        android:layout_height="wrap_content"
        android:layout_marginTop="16dp"
        android:ems="10"
        android:hint="Password"
        android:inputType="textPassword"
        app:layout_constraintEnd_toEndOf="parent"
        app:layout_constraintStart_toStartOf="parent"
        app:layout_constraintTop_toBottomOf="@+id/editTextTextEmailAddress" />

    <Button
        android:id="@+id/button"
        android:layout_width="wrap_content"
        android:layout_height="wrap_content"
        android:layout_marginTop="16dp"
        android:text="Show Text"
        app:layout_constraintEnd_toEndOf="parent"
        app:layout_constraintStart_toStartOf="parent"
        app:layout_constraintTop_toBottomOf="@+id/editTextTextPassword" />
</androidx.constraintlayout.widget.ConstraintLayout>
package com.examlpe.helloworld

import androidx.appcompat.app.AppCompatActivity
import android.os.Bundle
import android.widget.Button
import android.widget.EditText
import android.widget.Toast

class MainActivity : AppCompatActivity() {
    private lateinit var button: Button
    private lateinit var editTextName : EditText
    private lateinit var editTextEmail: EditText
    private lateinit var editTextPassword : EditText
    override fun onCreate(savedInstanceState: Bundle?) {
        super.onCreate(savedInstanceState)
        setContentView(R.layout.activity_main)

        button = findViewById(R.id.buttonSubmit)
        editTextName = findViewById(R.id.editTextTextPersonName)
        editTextEmail = findViewById(R.id.editTextTextEmailAddress)
        editTextPassword = findViewById(R.id.editTextTextPassword)

        button.setOnClickListener {

            if ( editTextName.text.toString().isEmpty()
                || editTextEmail.text.toString().isEmpty()
                || editTextPassword.text.toString().isEmpty()){

                Toast.makeText(this,"Please Fill All the Details",Toast.LENGTH_SHORT).show()

            }else{
                Toast.makeText(this, "Name -  " + editTextName.text.toString()
                        + " \n" + "Password -  " +  editTextEmail.text.toString().isEmpty()
                        + " \n" + "E-Mail -  " + editTextPassword.text.toString().isEmpty(), Toast.LENGTH_SHORT).show();
            }

        }

    }
}

Comments
Post a Comment